Hello, everyone! This is Chalirs®, your friendly home decor expert. A rain shower head can transform your daily shower into a luxurious spa experience. If you’re planning to install one yourself, you’ve come to the right place. Today, I’ll provide a detailed installation guide, covering preparation, tools and materials needed, step-by-step instructions, and important tips to keep in mind. Let’s get started!
Preparation Before Installation
Proper preparation is crucial to ensure a smooth installation process.
- Measure Your Shower Space: Determine the size of the shower head to ensure it fits comfortably in your shower area without obstructing shower doors or other fixtures.
- Turn Off the Water Supply: Locate the main water supply valve for your bathroom and turn it off. This step is essential to prevent water damage during the installation.
- Check Compatibility: Ensure that your existing plumbing is compatible with the new rain shower head. Some rain shower heads may require specific types of fittings or additional plumbing adjustments.
Tools and Materials Needed
Gathering all necessary tools and materials beforehand will make the installation process more efficient. Here’s what you’ll need:

- Rain shower head
- Adjustable wrench
- Screwdrivers (both Phillips and flat-head)
- Plumber’s tape (Teflon tape)
- Measuring tape
- Pipe wrench (if necessary)
- Thread sealant (optional)
- Ladder or step stool (if needed)
- Towel or cloth (to protect fixtures)
- Bucket or container (to catch any residual water)
Step-by-Step Installation Process
- Remove the Existing Shower Head:
- Use an adjustable wrench to loosen the connection between the existing shower head and the shower arm. Turn the wrench counterclockwise to unscrew the shower head.
- If the shower head is tightly fixed, use a pipe wrench for additional leverage.
- Once the old shower head is removed, clean any remaining plumber’s tape or debris from the shower arm threads.
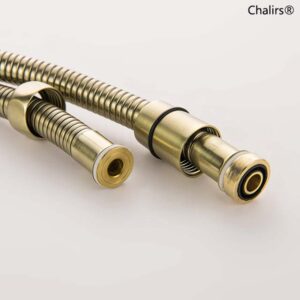
- Wrap the Threads with Plumber’s Tape:
- Apply plumber’s tape evenly around the threads of the shower arm. This will create a watertight seal and prevent leaks.
- Wrap the tape clockwise to ensure it doesn’t unravel when attaching the new shower head.
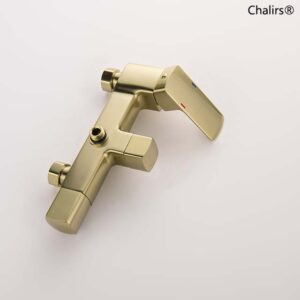
- Install the Rain Shower Head:
- Align the rain shower head with the shower arm and screw it on by hand. Turn it clockwise until it’s snug.
- Use the adjustable wrench to tighten the connection securely. Be cautious not to overtighten, as this can damage the threads or the shower head.
- Adjust the Position (If Applicable):
- Some rain shower heads come with an adjustable arm or extension. Follow the manufacturer’s instructions to adjust the height and angle to your preference.
- Ensure the shower head is positioned to provide optimal coverage.
- Turn On the Water Supply:
- Slowly turn on the water supply and check for any leaks. If you notice any leaks at the connection, turn off the water and tighten the shower head a bit more.
- Once you’re confident there are no leaks, fully turn on the water and test the shower head’s various settings.
- Final Adjustments:
- Make any final adjustments to the position and settings of the rain shower head to ensure it meets your preferences.
- Clean up any debris or residual water from the installation area.
Important Tips and Considerations
- Use Quality Materials: Investing in a high-quality rain shower head and components can prevent future issues and provide a better shower experience.
- Follow Manufacturer’s Instructions: Always refer to the specific instructions provided by the manufacturer for your model.
- Safety First: Use a sturdy ladder or step stool if you need to reach higher areas, and ensure the area is dry to avoid slipping.
- Seek Professional Help If Needed: If you encounter issues that you’re not comfortable handling, don’t hesitate to call a professional plumber for assistance.
By following this detailed guide, you can enjoy the luxurious experience of a rain shower head in your home. If you have any questions or need further assistance, feel free to reach out to Chalirs®. We’re always here to help you with your home improvement needs.
If you’re interested in rain shower heads, visit Chalirs® official website to explore more products and information.
Happy showering! Best regards, Chalirs®